Rope hammocks are perfect for relaxation during the summer season. They offer occupants a chance to rest and enjoy the outdoors. This type of lounge chair can be easily handmade with simple materials such as steel rings, polypropylene or cotton cords, hooks and some long wood pieces.
Dappled with sunlight and cradled by gentle breezes, these hand-knotted cocoons let you spend a languid afternoon learning how the leaves feel
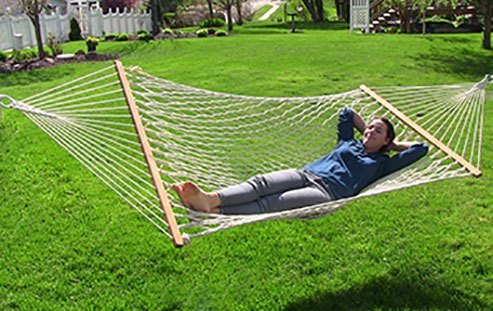
The Hammock is a byword for summer relaxation, offering occupants a chance to float between the green grass and green leaves or doze off as a half-read book slips from their grasp. Suspended between two shade trees, this knotted “lounge chair” demands only that you slow down and take your time about
things; those who attempt too hasty an entrance or departure from a hammock may suddenly find themselves tossed out on the cool grass below! And, since no one should have to face housework or yard chores without a pleasant escape within view, we have included instructions for making a hammock of your own.
Contents
Make Your Own Hammock
Simple tools, some cord, and a little bit of time can turn a couple of favorite shade trees into a dreamy resting spot
Follow these instructions to make a 6-foot-long hammock.
MATERIALS
250 yards 6-mm polypropylene or cotton macrame cord 23-inch-diameter brass or steel rings 10-inch-long netting needle 10-inch-long 2- by 1/4-inch wood lathing strip 2 large, strong hooks 2 24- to 30-inch-long, 1-inch-diameter dowels, notched at ends Rope for hanging the hammock
Preparing Rings for Netting
Cut off one piece of cord about 15 yards long. Starting about 30 inches from one end of the cord, form a clove hitch in one of the metal rings. Leave a 20 inch-long loop (40 inches of cord) and make another clove hitch in the ring. Continue this until there are 12 long loops of cord. Secure the dangling starting and stopping cord ends to the bottom of the nearest loop with slipknots. Repeat this process with the other ring.
How to Make the Netting Knot
Load the netting needle. Following Figures 3 and 4, pass the needle up and through a diamond mesh (on your first row this will be through a loop on the ring) and throw the cord to the right, over the right side of the mesh (loop). Then pass the needle left, across the back of the mesh (loop). Bring the needle toward the right and under the loop you have just thrown. Pull the knot tight to make sure it stays around the mesh (loop) and does not slip.
To make the second and remaining knots of each row, hold the mesh stick under the former knot in the crook of your left hand. Throw the cord over and under the mesh stick and proceed to the next mesh (loop) and make the same knot. There should be no slack around the stick or in the knot.
Always use the needle to pull the cord or your fingers will soon be sore. To keep everything tight, pinch the point where the string enters the mesh (loop). A right-handed netter will pinch with the left hand. The thumb will be in front of the mesh stick and the index finger behind, with the stick resting in the crook. The right hand is free to make the knots. The length of cord between each knot must be 4 inches, two times the width of the mesh stick. Keep the mesh stick inserted in the loops until the stick gets crowded, then slip the meshes off the left end as necessary.
When you run out of cord, reload the needle and tie the first knot in the same mesh, producing two knots, as when you increase (see below). Slipknot loose ends onto the closest cord.
Netting the Increased End
Hang the ring on a strong hook so you can pull the knots tight. A right-handed netter will work from left to right, a left-hander in the opposite direction. Starting on the outside left loop on the ring, tie your first netting knot. Take the cord around the mesh stick and tie a second knot into the same loop, just beside the first. This double knot on the outside reinforces the edge. Take the cord around the mesh stick and knot into the next loop. You’ve just made a mesh.
Continue across until you reach the end of the row, then unhook the ring and turn the hammock over so the next row can also be worked from left to right.
To start the first mesh of the next row, drop the cord down 2 inches below the previous row. Knot the first mesh as usual but when passing the needle around the back of the mesh, include the long outside cord. This reinforces the outer edge. Make two more meshes and then tie the next knot into the same mesh. This method produces an increase of meshes for the next row. Make three more meshes and then another increase and continue in this rhythm until you get to the end of the row. Don’t worry if you place the increases in an irregular fashion. It will all turn out just fine in the end.
Turn the hammock over and knot another row into each mesh, making the reinforced edge as before. Now there should be 15 meshes in the row.
Turn the hammock and knot a row, increasing in every fourth mesh. Turn the hammock again and net a plain row. Now there should be 18 meshes in the row.
Turn the hammock over and knot a row, increasing in every fifth mesh. You should now have 21 meshes in the row.
Netting the Center Area
Continue netting straight for 24 rows to produce a finished center length of 45 inches. (You can shorten or lengthen the hammock by any amount divisible by 2 inches, the length of a row.)
Netting the Decreased End
After netting the center area to achieve the desired length, you will need to decrease the meshes on alternate rows. This reverses the increased or starting-end procedure.
Turn the hammock over and net four meshes. Before throwing the cord around the mesh stick, pass the needle into the next loop and knot it against the previous mesh, knotting the two together. Continue across, decreasing in every fourth mesh. Turn the hammock and net a plain row.
Net five meshes and decrease one again. Continue across, decreasing in each fifth mesh. You now have 18 meshes per row. Turn, and net a plain row.
In the next row decrease every fourth mesh and then net a plain row. There should then be 15 meshes in this row. If your count is higher, reduce in this plain row. If your count is lower, skip one of the decreases in the next row.
Net three meshes and decrease one; repeat until you have a total of 12 meshes, one to pair up with each long loop on the second ring.
Adding the Second Ring
This addition is easier if each ring can be hung from a hook, close enough for the loops to meet. Or ask a friend to hold the second ring.
At 4 inches from the end of the cord on the netting needle, slip-knot the cord to the bottom of the far left loop on the second ring. For reinforcement, make a second slipknot in the same loop. Holding the mesh stick between the loops on the ring and the hammock, take the needle to the far left hammock loop and make a knot. Carry the cord up and over the mesh stick and make a knot in the next long loop on the ring. Continue in this manner, alternating knots between the ring loops and the hammock loops until reaching the end. Finish the last loop with two slipknots.
For a final reinforcement of each side of the hammock, knot a length of cord on one ring, wrap it around each outer mesh cord, and tie the other end onto the opposite ring.
Hanging the Hammock
Into each end row of meshes, fit a notched dowel as a spreader to hold the hammock open. Using a clove hitch, attach the center of two custom-cut lengths of rope (twice the distance from the ring to the tree limb to which you plan to secure it, plus several yards for tying; each ring should be roped to two limbs) to each ring.
Shopping Tips
Your lumberyard will carry lathing strips and dowels for the mesh stick and spreaders. Most will even cut the pieces to size for you. Craft and hobby shops sell 6-mm cord. If you use cotton cord, avoid getting the hammock wet. Netting needles are available by mail from Lacis.
Leave a Reply